Here’s a shocker: The original rear hatch supports/struts on our 1994 Mitsubishi Delica Space Gear were shot, and the hatch wouldn’t go all the way up when we’d open it. Fortunately upgrading the Delica Space Gear hatch supports / struts is easy. I’d previously looked for replacement units, but there weren’t any available, or at least available easily or without paying through the nose if you could even find them. Fortunately, a user on the MDOC: Mitsubishi Delica Owners Club Facebook page (and Delica Forum) came up with a solution for upgrading the Mitsubishi Delica Space Gear’s hatch supports, and it’s pretty easy to do. FYI, this method will greatly increase the overall height of the hatch and add a lot more power for lifting it, too.
Here’s a how-to based on their info and my installation. Here’s what you’ll need to do this as we did:
- Two 32″ lift struts with 13mm cups
- 13mm ball studs
- 12 mm socket and a ratchet
- 12 mm wrench
- Two 1/2″ wrenches (for new ball studs) or one 1/2″ wrench and a 1/2″ socket
- M8-1.25 die (for retapping the 5/16-18 threads on new ball studs)
- Grinder
- Torch
- Black spray paint
- Ladder to support liftgate
1. Remove Old Struts.
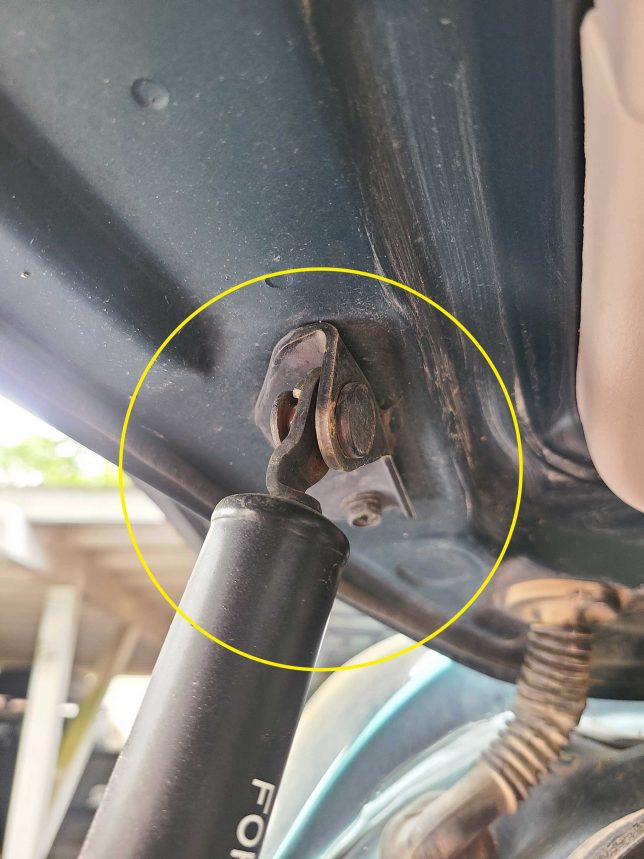
Start by removing the old struts. You’ll need to pull the bracket off with them. There are two things to do here. Firstly, there are two 12mm bolts at the top and …
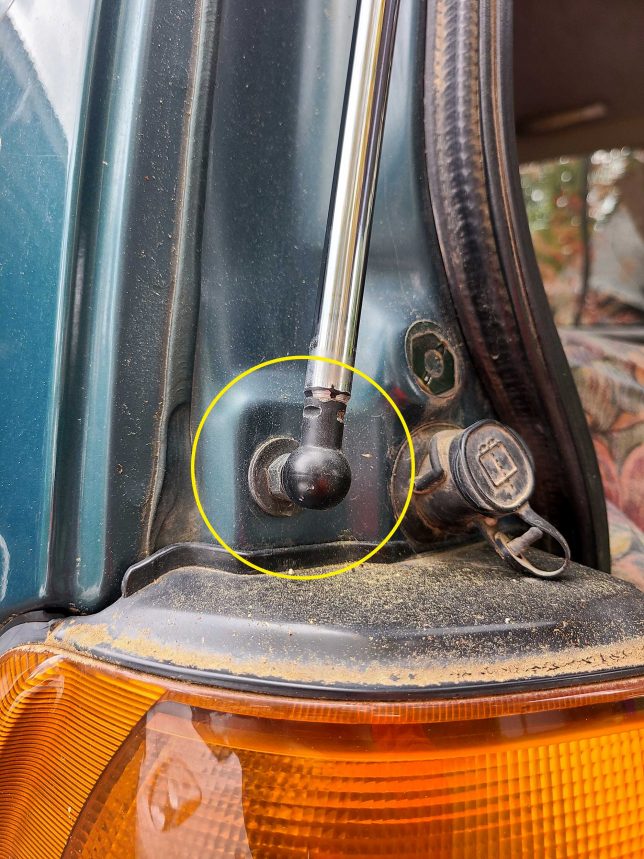
… factory ball studs with 12mm bolts. You can get this one with your 12mm wrench.
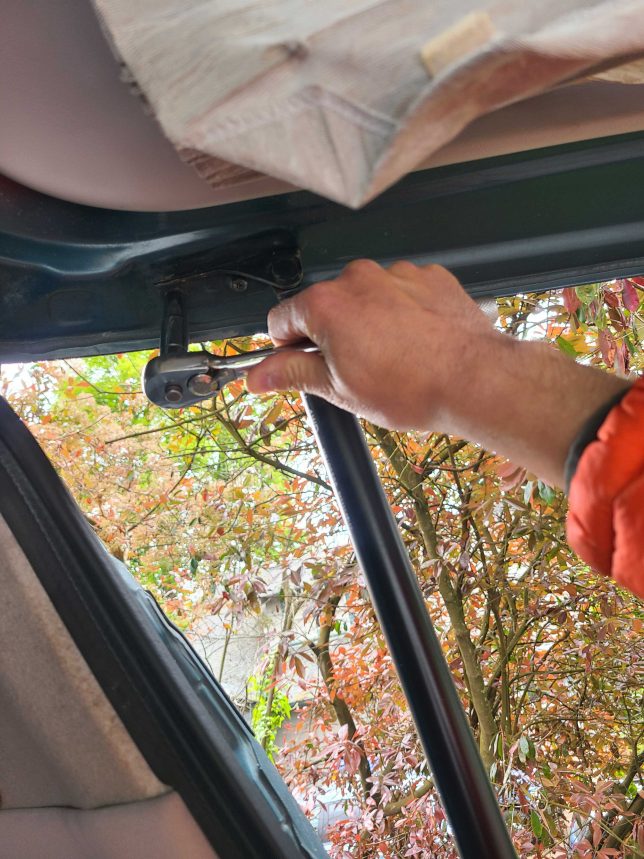
Use a 12mm socket and wrench to remove the upper bolts. The lower ball studs are also a 12mm bolt. You’ll need to unscrew these from the body. It’s a good idea to have a helper and a ladder handy for when the hatch wants to close. Use the ladder to support the liftgate once the uppers are disconnected. Be careful as once one support is disconnected, the liftgate will come down!
2. Tap and install new ball studs.
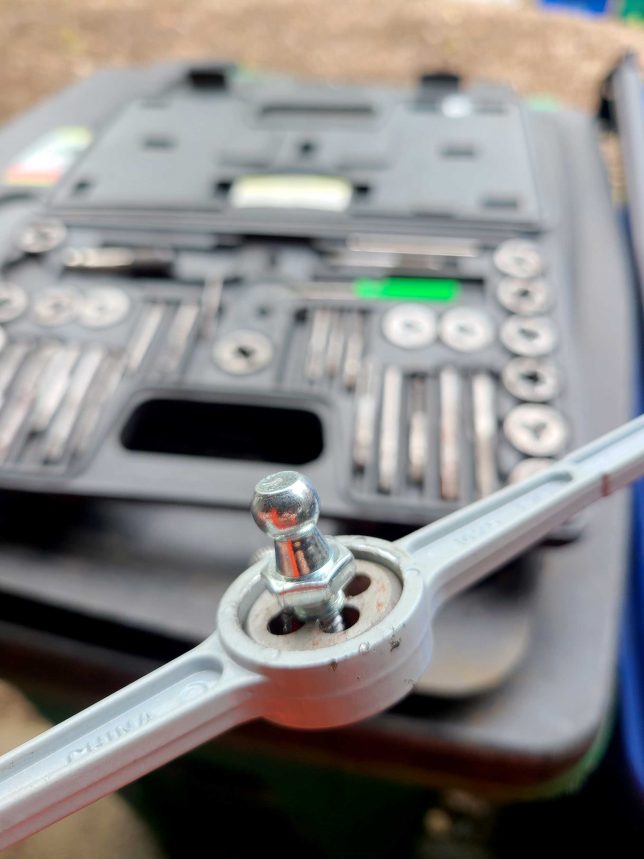
Getting the factory ball studs off the original supports seems nearly impossible. Instead, I purchased a new set of four ball studs with 13mm balls and 5/16-8 thread. However, the factory hole is actually going to be an M8-1.25 thread. Since these are relatively close, you can simply retap the new 13mm ball studs with an M8-1.25 die, which is easy. They’ll thread right in.
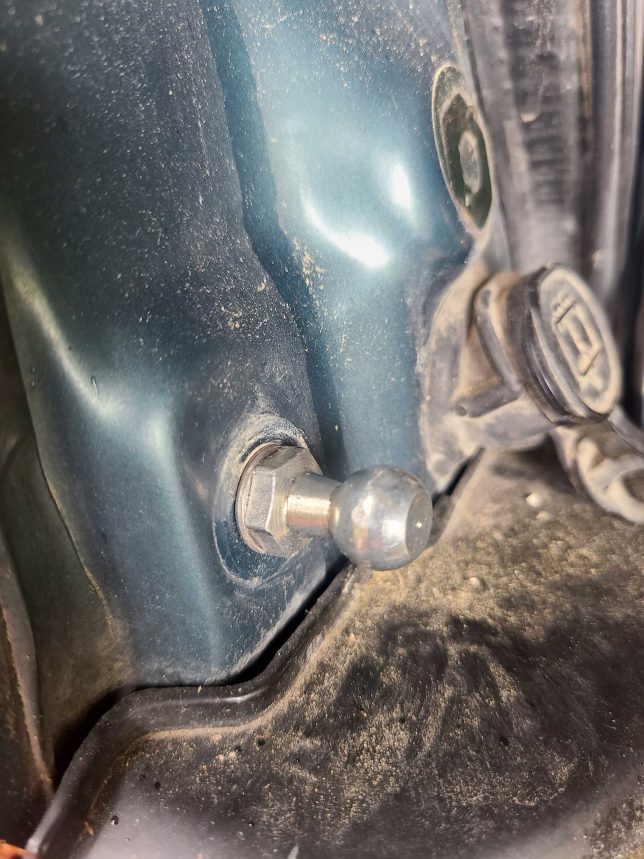
Make sure you install a washer under the new ball stud so it doesn’t bite into the paint when you tighten it down with a 1/2″ wrench.
3. Remove upper brackets from original supports.
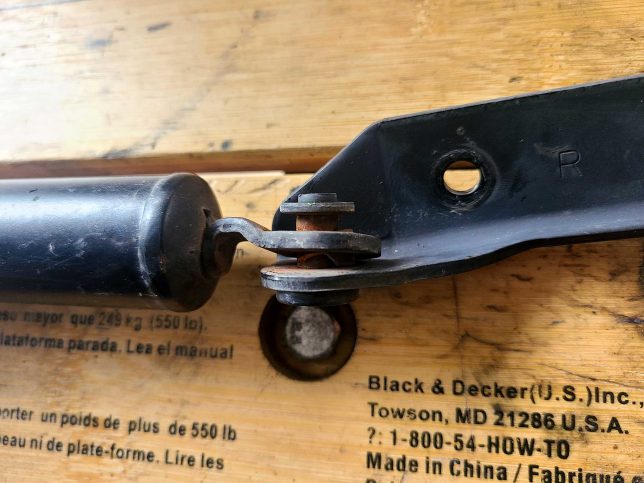
We’ll need to reuse the upper brackets from the struts. Those brackets are, however, held captive by this stud. Get out your grinder, because it’s time to cut.
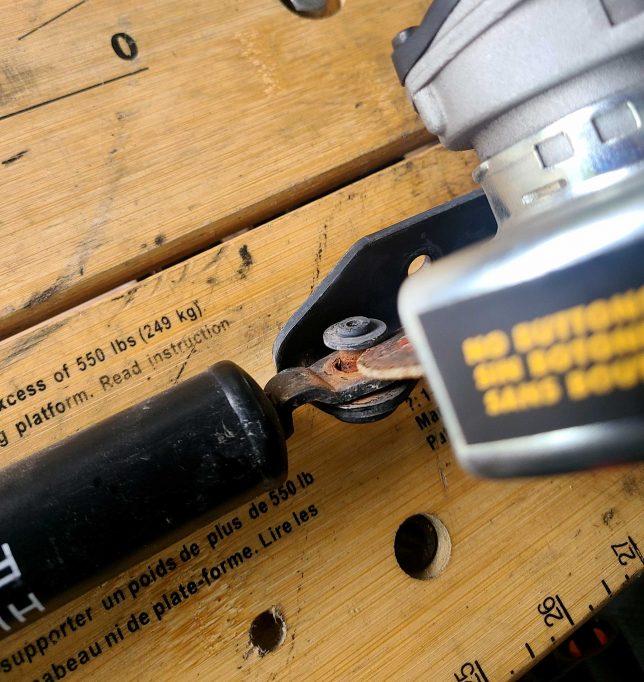
Just cut this little guy right here, and the strut will come off. Don’t forget your safety glasses and gloves, too.
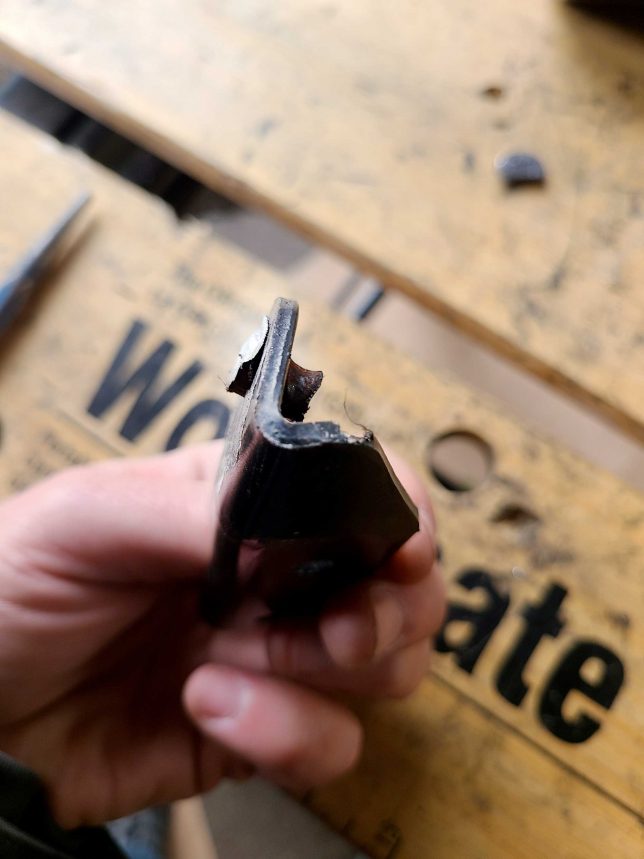
Once that shock is cut off, you’ll be left with this. You’ll want to grind one side off to break the tack welds that also hold this stud in. Here, that’d be the left side.
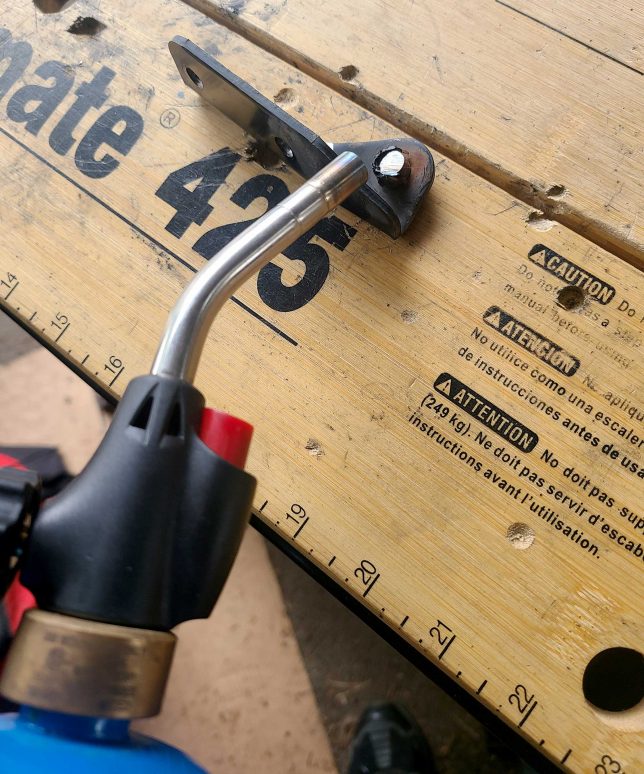
After grinding down one side and breaking the spot welds, get your torch out and heat up the area around the stud. Once heat has been applied, use a big hammer and a punch and that rivet will punch out after a couple of blows.
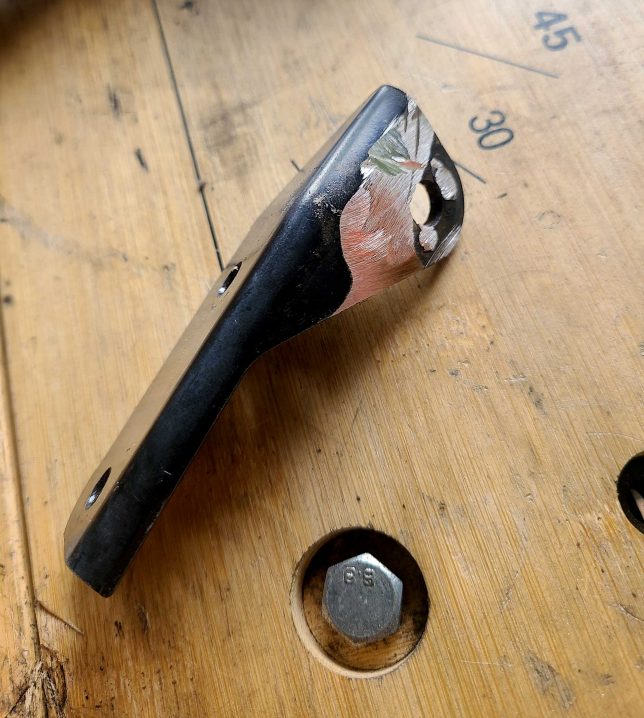
Once things cooled off, I hit this bracket with some black paint to prevent corrosion. Our paint had primer in it, so we didn’t prime it first.
4. Install the top ball studs.
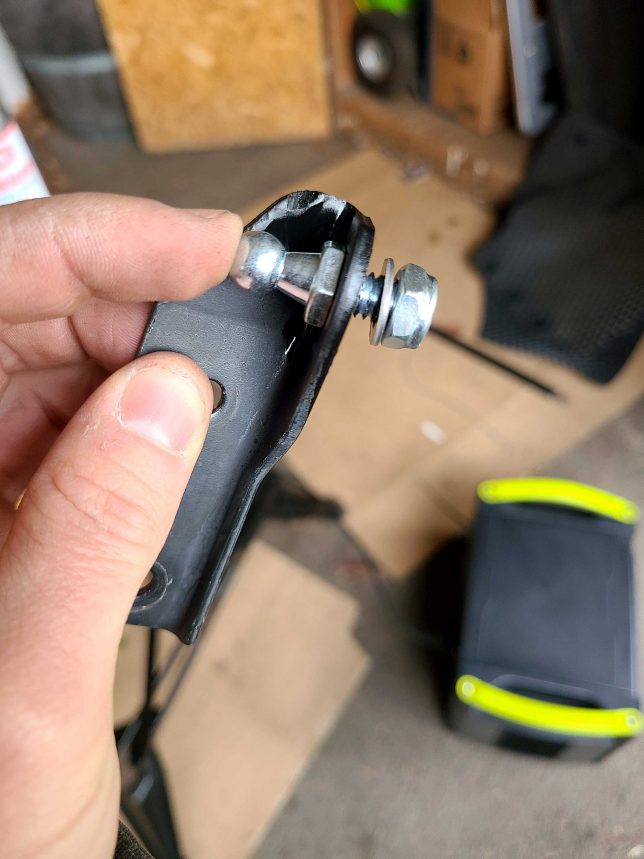
Once that paint is dry on the bracket, install your ball stud in this orientation using the washer and the locking nut. I used two 1/2″ wrenches to hold one side while turning with the other.
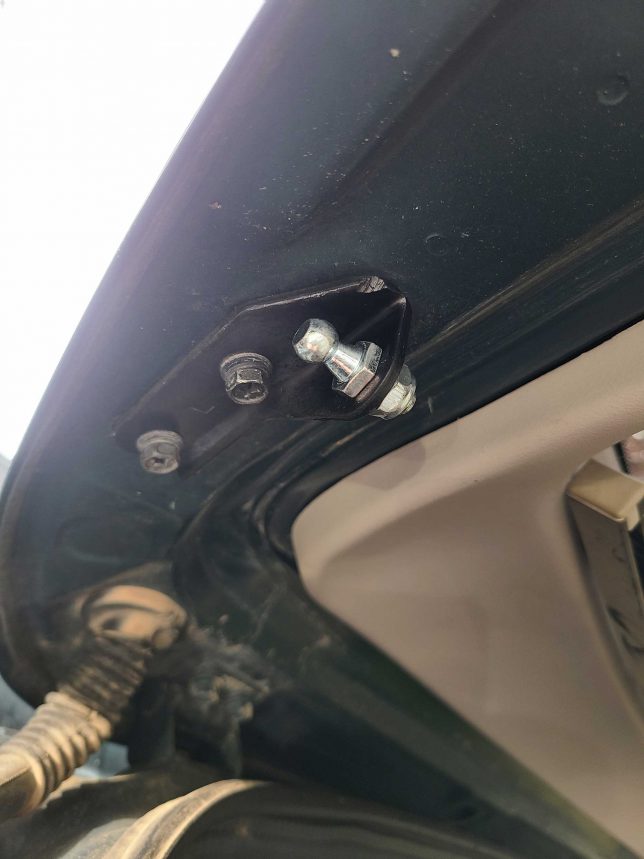
Go ahead and reinstall the bracket to the liftgate like so using the 12mm wrench or socket.
5. Install the new struts.
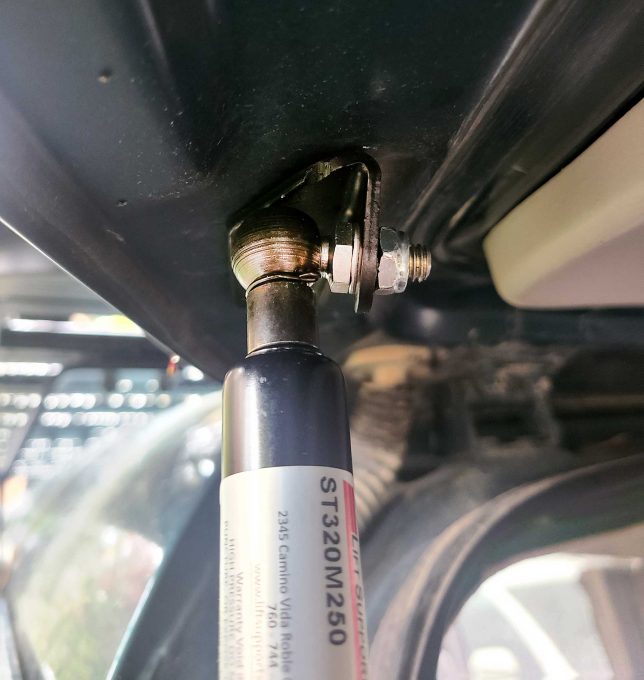
Now it’s time to install the struts themselves. I started at the top. The ball cups on the supports will all have a simple wire clip that helps to retain the ball stud to the strut. So first, you’ll need to remove that clip. Press the cup onto the ball, then reinstall the clip, and the top will be secure.
Now, remember: these struts are going to provide a lot more height than the factory ones. You’ll either need someone to lift the gate up higher while on a ladder, or you’ll need taller ladder (or something to prop the liftgate up on the shorter adder). Just remember to be safe when doing this.
FYI, the bottom ball cups will go on the same way as the tops.
Taller, more powerful struts for about $70!
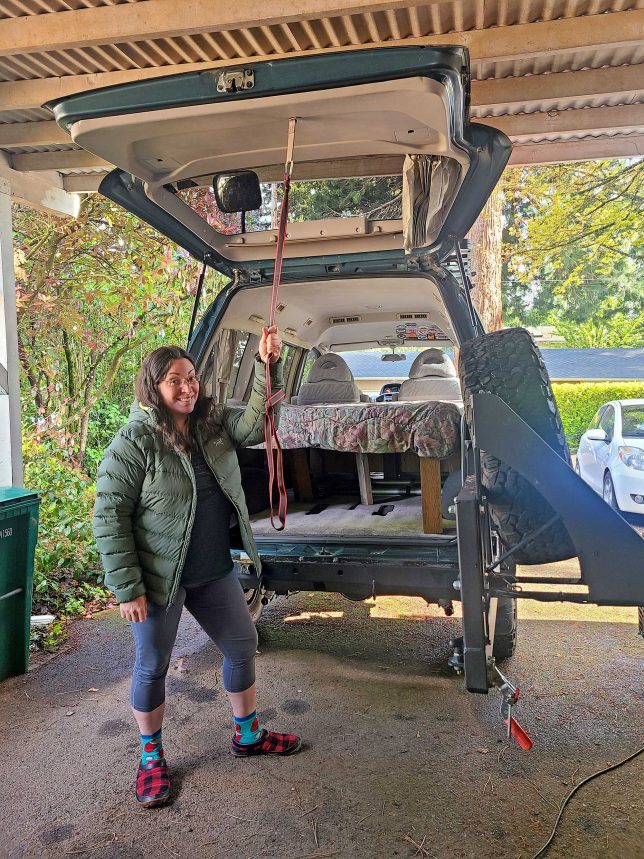
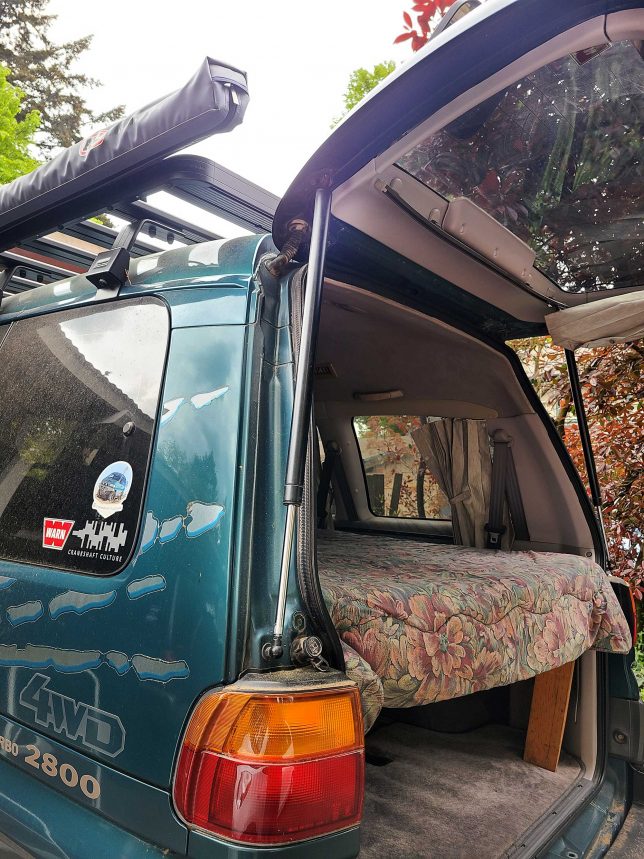
For reference, Mercedes here is 5’4″ tall. We had to fashion a tether of some sort so she could reach to close the hatch. The tailgate is easily another couple of feet higher up. There are no clearance issues and no rubbing with this new height, by the way! And now, this hatch goes up with force. I think I could probably launch cantaloupes with it. In all seriousness, it opens with a lot of force; we actually have to be careful of it. It also takes quite a bit more muscle to bring it down. But upgrading Delica Space Gear hatch supports / struts was an easy task overall and a worthwhile upgrade.
Needless to say, this upgrade took care of our old weak tailgate issue. However, these might be a little too high for us short folk, but we’re going to give it some time before we opt for shorter struts. But regardless, this is a massive improvement over the old worn-out struts, and the whole project cost us about $70 USD. I’d say that’s a great deal. So if you need to replace the struts on your Mitsubishi Delica Space Gear, you now know how!
Got questions, comments, or concerns? Leave them in the comments.

Andy Lilienthal is an award-winning writer and has written professionally since 1999. He has over 13 years in the automotive aftermarket working at companies including Warn Industries, Bushwacker, and Lund International. Editorial works include writing and photography for off-road print magazines, to new-car reviews online. He’s a photographer with images in multiple magazines, blog sites, and The New York Times.

Leave a Reply