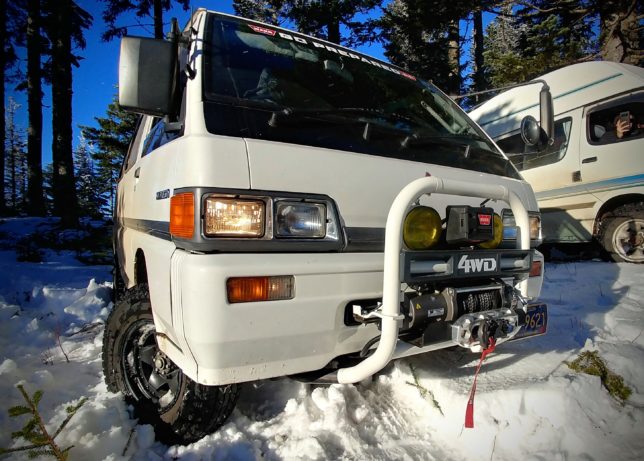
So you’ve bought a Mitsubishi Delica Star Wagon (L300) and you want to take it everywhere. You’ve got all-terrain tires, jerry cans, a full-sized spare, and solar panels. But you want to make sure you can get out of a stuck situation, so you start looking for winch mounts or bumpers. Well, there are very few if any off-the-shelf solutions for a Delica Star Wagon, so a couple years ago, we decided to have our own made.
There were two main objectives with this project: It had to be capable of pulling the van (and not ripping the front end off) and I wanted it to be located in between the uprights on the factory bull bar. Challenge accepted.
Ever since installing the winch on the Space Tractor, our ’89 Delica, I’ve been asked to see how it’s mounted and how we did it. Ladies and gentlemen, here is your answer.

1. First off, the winch. We needed something that would be compact enough to fit between the bull bar’s tubes and something fairly lightweight. I happened upon a WARN M6000 with steel cable. This is a 6,000 lb. capacity winch. I changed over to Spydura synthetic rope due to its lighter weight and ease of handling. While WARN does not offer the M6000 any more, they do offer the M8, which is the same size but with 2,000 more pounds of more pulling power, and is perfectly suited to the L300’s weight.

2. Now we need a mounting plate. I got a WARN Universal Winch Mounting Plate and opted for the kit, which includes a mount for the control pack, too. This plate was too wide to fit in the bull bar, so it was narrowed to fit. Now, how do we attach it?
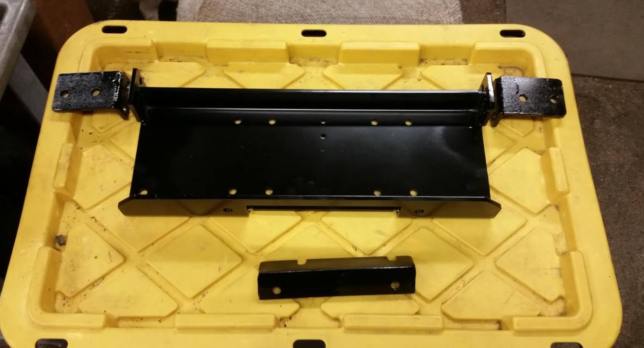
3. Here’s the narrowed plate along with some custom-fabricated brackets. Tabs were welded onto the back of the plate’s corners, and L-brackets were fabbed up. The custom bracket on the bottom attaches to existing holes on the bull bar’s crossmember and bolts to the plate for added stability.

4. Now it was time to bolt everything up. We had to remove the two black plastic covers that adorn the welds on the bull bar’s mid sections. After that we used the hardware that comes with the winch and attached it to the plate, then the fabricator used bolts, nuts, and washers that fit our application to bolt up the mount. Specifically:
• Two bolts go through the factory metal tabs to which bull bar is mounted; they protrude from the grille. These bolts need to be long enough to go through the tops of the L-brackets.
• Two more bolts attach the L-brackets to the tabs welded to the plate.
• Two bolts attach the lower brace to the factory drilled holes in the bull bar, and two to the winch mounting plate.
Everything was tightened up to ensure a proper fitment. You’ll notice the mount actually bolts to the same tabs that hold the bull bar. This appears to be about 1/4″ steel and very strong.

5. Once the vehicle was home, I removed the winch so we could wire it up. This isn’t a very straight-forward task on this van because the battery is located under the seat. I got 12.5′ of 1 awg (aka 1 gauge) battery wire (positive and negative) with the correct ring terminals on the end. I removed the van’s “air guide” plates under the front end in order to run the cable up through to the engine bay where the battery resides under the passenger’s seat (remember, our van is right-hand drive). NOTE: 12.5′ is a bit long, so I coiled some of the battery wiring up and zip tied in securely in place. I’m guessing 10′ would likely be enough. Oh, and being 1 awg wire, this stuff isn’t very easy to work with. Once everything was wired up, I replaced the air guides under the van.
I swapped the M6000’s old control box, which uses solenoids, for one from an M8000, which employs an Albright contactor. A contactor is generally more reliable, efficient, and waterproof vs. old-school solenoids. Warn offers an control pack upgrade kit that’ll include not only a contactor control box, but a few other niceties as well; a nice upgrade for about $168 at the time of writing.
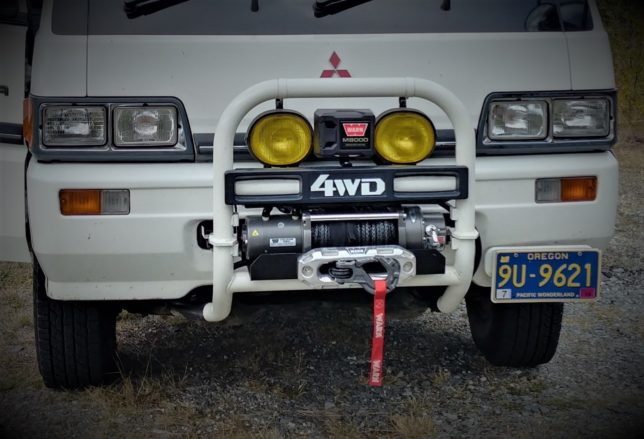
6. Now I had to mount the control box. I used the mount included with the WARN kit, but had to cut it down significantly, then attached it to the plastic “4WD” cover on the bull bar cross member and finished up the wiring job.
7. I pulled off the steel cable and then attached and re-spooled the new 100′ of Sypdura Synthetic rope onto the winch’s drum. This was done under tension, and we ensured the wrap was evenly spooled onto the drum. Whenever you convert from wire to synthetic rope, you’ll want to add a smooth, wide-radius hawse style fairlead. I went with a WARN Epic 1.5 Fairlead in the polished finish. I also added a WARN Epic Hook, too.
We’ve made several pulls with this setup and it’s worked great without deflection or other issues. We’ve even done double-line pulls to the loop which attaches to the bull bar without damage. You can see in this video how the winch has worked. This was shot at the Florence Sand Dunes in Oregon. It was part getting stuck, part real-world training for Team Anyway, a 2019 Rebelle Rally entry.
We’ve been very happy with this setup, and now you can see how it was made! Questions? Leave them in the comments.

Andy Lilienthal is an award-winning writer and has written professionally since 1999. He has over 15 years in the automotive aftermarket working at companies including Warn Industries, Bushwacker, and Lund International. Editorial works include writing and photography for off-road print magazines, to new-car reviews online. He’s a photographer with images in multiple magazines, blog sites, and The New York Times.
Leave a Reply